1. Human error
(1) The operator has insufficient technical proficiency and poor practical experience, and should be used by personnel familiar with the hardness tester;
(2) The loading is too fast, the holding time is short, and the hardness of the low-hardness parts is high, while the loading is too slow, the holding time is long, and the hardness is low. The loading should be smooth during operation to maintain a certain loading time.
2. Factors affecting the tested parts
(1) Different surface finishes show different effects during Rockwell hardness testing. The lower the surface finish, the higher the hardness in the high hardness test. Conversely, the lower the hardness, the rougher surface with a knife mark, the fastest cooling first during quenching, or the very hard surface layer, the higher the hardness value. Conversely, when the tempered part is tempered at high temperature, the surface structure with the knife mark is transformed first, the ability to resist tempering is small, and the hardness value is low. When testing parts with a surface finish of less than Δ7, it must be finely ground with a waste grinding wheel, smoothed with a file, or polished with a fine hand grinding wheel, and then wiped clean.
(2) The surface of the heat-treated parts has salting, sand, etc. When the load is applied, the parts will slip. If there is oil, the diamond head will lubricate when it is pressed in, reducing friction and increasing the depth of pressure. These two reasons make the measured hardness value low. The hardness value of the thin layer of oxidized skin and vegetable pine in the part where the parts are tested decreases, and the hardness value of the thick layer of oxidized skin increases. For parts to be tested for hardness, oxide scale must be removed, wiped clean, and there must be no dirt.
(3) The error of the hardness test of the inclined surface (or taper), spherical surface and cylindrical part is larger than that of the plane. When the indenter is pressed into the surface of such parts, the resistance around the indentation is smaller than that of the plane, and there is even a phenomenon of deviation and slippage. The pressure depth increases and the hardness decreases. The smaller the radius of curvature and the greater the slope, the more significant the decrease in hardness value. Diamond indenters are also easily damaged. For such parts, a special workbench should be designed so that the workbench and the indenter are concentric.
Third, the impact of indenter
(1) The diamond indenter does not meet the technical requirements or wears out after a period of use. If the operator cannot judge the quality of the diamond, it can be verified by the measurement and testing agency.
(2) The strength and hardness of the steel ball indenter are not enough, and it is easy to deform. When the steel ball is flattened and permanently deformed, it shows an ellipse. When the short axis is perpendicular to the surface of the part, the indentation is shallow and the indication value is high; when the long axis is perpendicular to the surface of the part, the indentation is deepened and the indication value is reduced. mm
Fourth, the load
(1) Initial load: There is friction between the spring and the main shaft, lever and dial indicator, causing an increase or decrease of 100N. The adjustment screw is loose, the adjustment is moved, and the position of the jack is improper. The starting line is different, causing the initial load to be incorrect. If the initial load is not correct, adjust the coordination of the spring, spindle, lever, dial indicator, etc. After the position of the adjustment block is moved properly, tighten the adjustment screw and at the same time tighten the position of the top rod. The tolerance of the initial load should be less than ± 2%.
(2) Main load: The ratio of the lever is not correct, and the balance weight of the hanger and the weight has errors; the main shaft, lever and weight are skewed, which will cause errors in the main load. The leverage ratio is not correct and should be adjusted. The blade should be repaired or replaced if it is worn, and the deformation of the main shaft should be straightened. The main shaft, lever and weight deflection should be adjusted. The tolerance of the main load of various scales is less than ± 0.5%.
5. The hardness tester is not installed correctly
The hardness tester is not in a horizontal position and its value is low when testing hardness. Use a spirit level to measure the level, then level the hardness tester.
6. The surface of a test part of the part is in poor contact with the workbench
Poor contact between the surface of a test part of a part and the workbench or unstable support points will cause slippage, rolling, and warping. This not only makes the results inaccurate, but also damages the instrument. A suitable workbench should be designed according to the geometry of the part.
Seven, the impact of the surrounding environment
The hardness tester produced in the factory is often affected by the vibration of the surrounding environment, causing the instrument structure to loosen and the indication value to be unstable. The hardness tester should be installed in a place without vibration or far away from the source. Therefore, it is widely used in the production of Brinell hardness value of unquenched steel, cast iron, non-ferrous metals and softer bearing alloys.
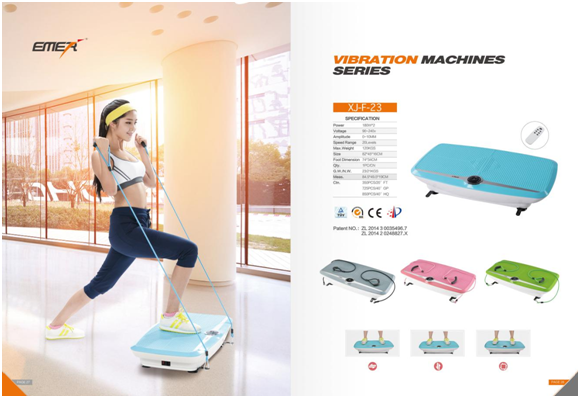
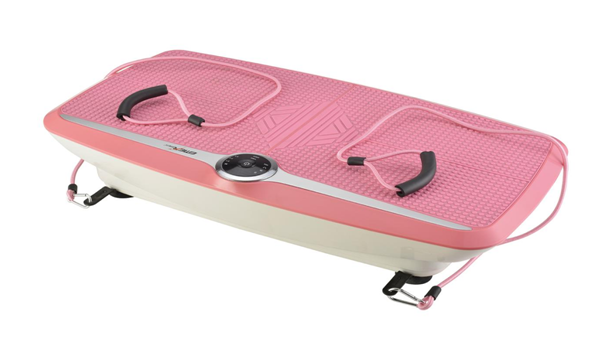
It is a popular Weight Loss Fitness Machine
in the world with two 180W motors .It is a Vibration Platform Machine with blue
tooth . The model is XJ-F-23 . Blue , pink , gray is the three main colors to
clients at present . Especially blue color is welcome to Germany and USA . The
product configuration is high and with much extra function , for example , blue
tooth music , sports rope , etc . The quality is good with lovely designs . The
Crazy Fit Massage Vibration Plate can move left to right , front to cack ,
circle. It is hot sell in the world . So good Vibration Machine , please choose
it as soon as possible .


XJ-F-23
SPECIFICATION
Power
180W*2
Voltage
90 to 240V
Amplitude
0 To10 MM
Speed Range
20Levels
Max Weight
120 KGS
Size
82*45*16 CM
QTY
1PC/CN
Foot
Dimension
74*34CM
G.W./N.W.
23/21KGS
Meas
84.5*49.5*19CM
Ctn
350PCS/20`FT
725PCS/40`GP
850 PCS /40`HQ
Double Motors Vibration Machine
Double Motors Vibration Machine,Weight Loss Fitness Machine,Vibration Plateform Machine With Bluetooth,Dual Two Motor Whole Body Vibration
ZHEJIANG MEIER FITNESS EQUIPMENT CO., LTD , http://www.chinameier.com